This post is brought to you by Happy Crafters. All opinions are 100% mine!

If you make handmade Halloween costumes, you know this week is crunch time! {Unless you are the super-on-top-of-it crafter, then you’re probably done already! I am not.} I am definitely a procrastinator when it comes to Halloween costumes. {raise your hand if you’re with me on this!}
I make their costumes every year, but I am literally still hot gluing as the kids are walking out the door to trick-or-treat on Halloween! And this year of course is no exception. I just started making costumes yesterday…. 🙂 And for the first time, the whole family is dressing up for Halloween. Typically, I only have to make 2 costumes {for my 2 boys}, but this year, I have to make 5 since we have a new addition to the family. Awesomesauce. So I now have to bust out 5 costumes this week…yikes! But thankfully, we’re doing something fairly easy. We’re going to be The Incredibles family, just like the movie. And thanks to my trusty Silhouette and some heat transfer vinyl from Happy Crafters, I’ve got the shirts practically done!

First, I designed the Incredibles symbol using my Silhouette Studio software. The Designer software and the extra tools that came wiith my Silhouette makes it really easy to design your own shapes.
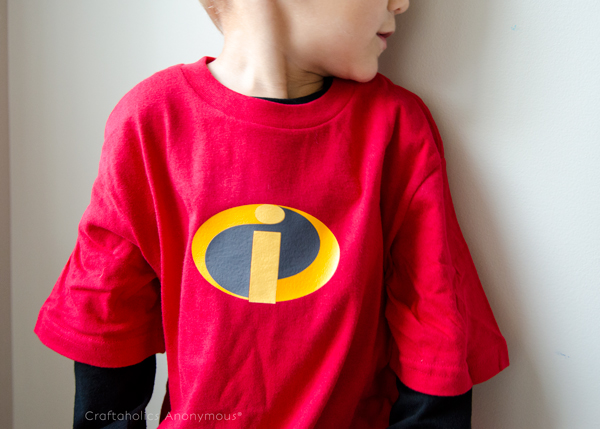
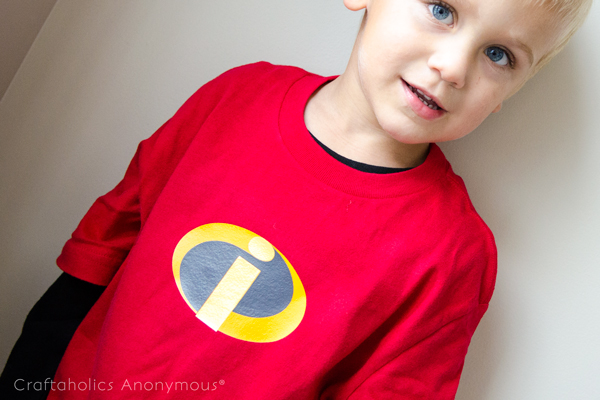
I used 3 different colors of heat transfer vinyl for the logo: black, yellow, and orange.
Layered Heat Transfer Tutorial
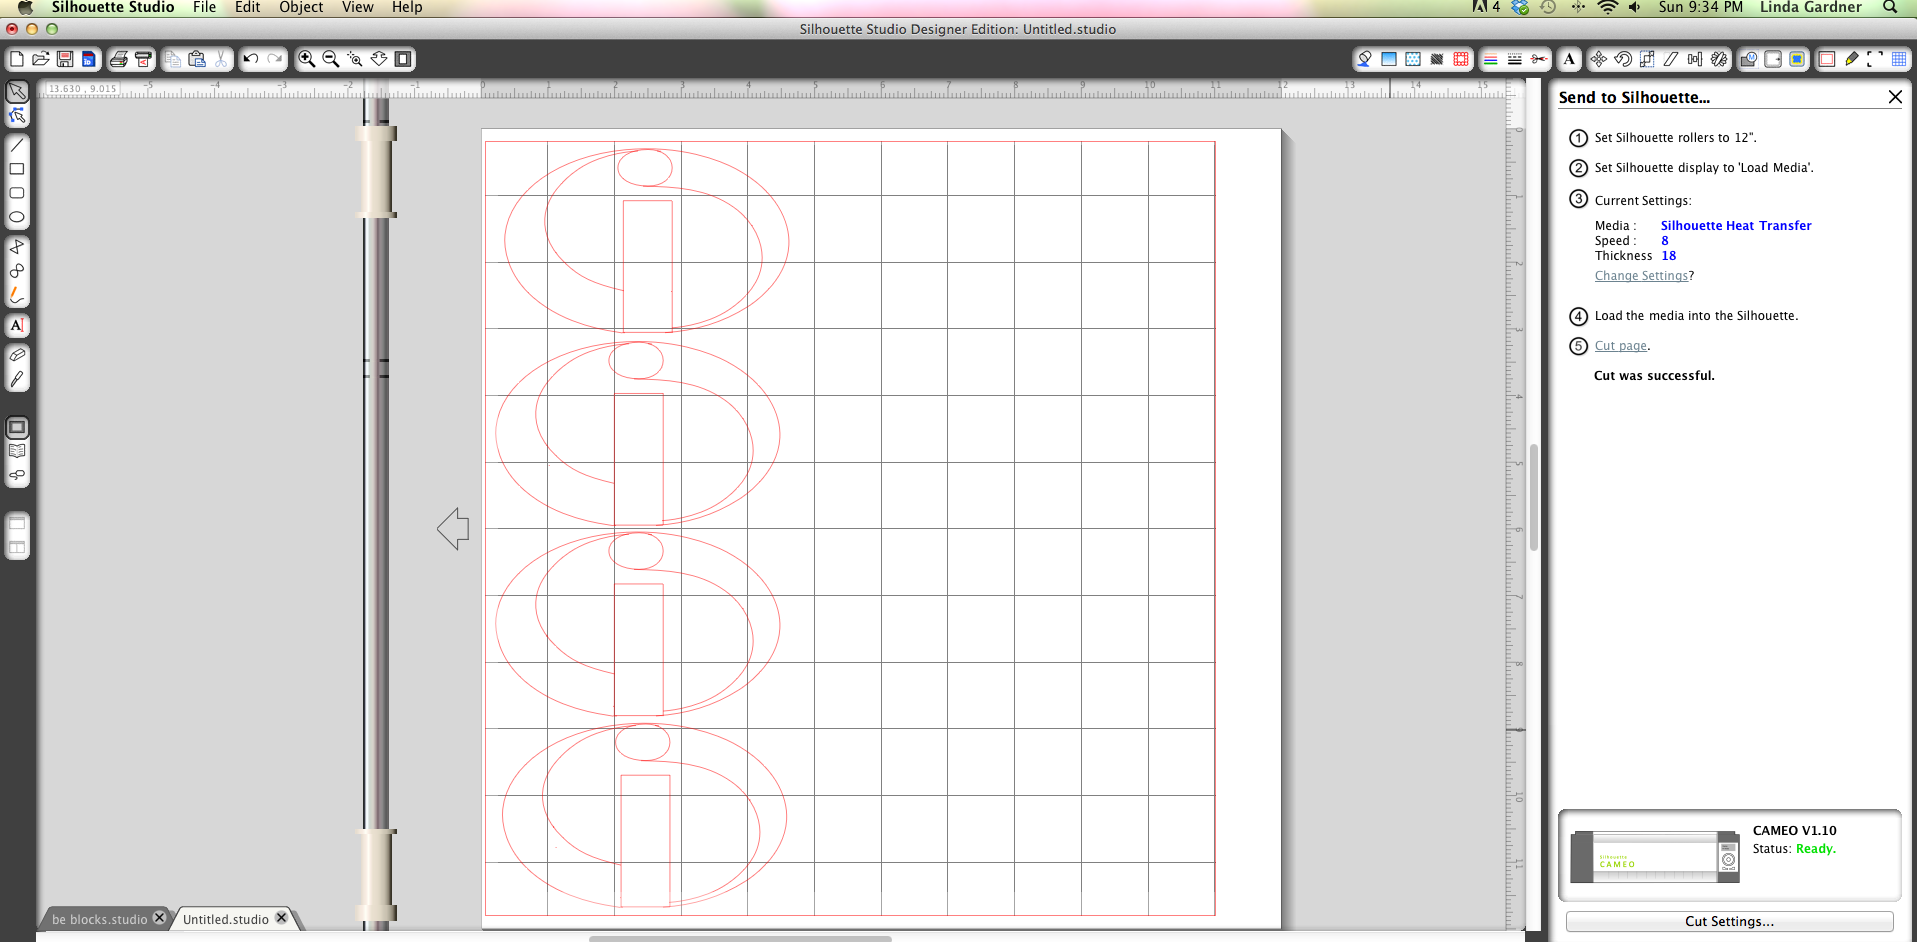
1. Using the circle tool, I created 3 ovals and used the text tool for the “i”.
2. Then I used the eraser tool to remove the extra lines to create the swooshes around the “i”.
3. Next, I flipped it horizontally before cutting. {this is really important if you are cutting words}
4. I fed the heat transfer vinyl into my Silhouette machine WITHOUT a cutting mat and with the plastic side down.
5. Remove the extra vinyl around your design.
6. Iron the heat transfer with the plastic side up with a cloth over it, for about 45-60 seconds, pressing down firmly. I ironed the orange first {I did not remove any of the orange heat transfer from the logo. I used the entire logo since it was my base color}, then I ironed the black on top of the orange, and then the yellow. {iron for the full time for each additional layer of heat transfer. Allow to cool for a couple minutes between layers.}
*Tip: Heat transfer should look like it melted into the fabric. If it is merely sitting on top, then you’ll want to iron longer. I highly recommend using a stopwatch or clock so your timing can be exact.
So what you see is about all I’ve gotten done with their Incredibles costumes. I’m hoping I’ll be lucky enough to get them done BEFORE Halloween so that I can post pictures! {I never posted last year’s costume pics because they got done too late!} You can check out the cute handmade Bob the Tomato and Larry the Cucumber costumes from 2 years ago here.
Have you finished your Handmade Halloween Costumes yet?
You can connect with Happy Crafters on Twitter, Facebook, and Pinterest. Don’t miss a Craft! Follow Craftaholics Anonymous® on Bloglovin and on Pinterest! Disclosure: I received one or more free products featured in this post. See my disclosure page for a complete statement.
